Beginners · The DragSale journal
How to Start Doing Drag: A First-Time Transformation Guide
Start doing drag with one manageable look. Learn how to choose a direction, plan a small kit, practise makeup and outfits, and use a first-look checklist.

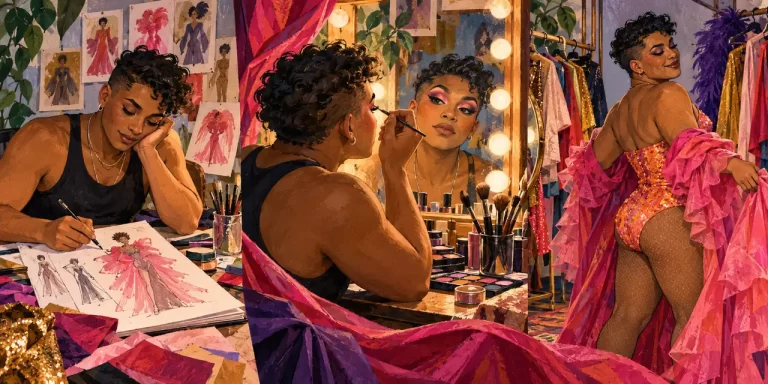
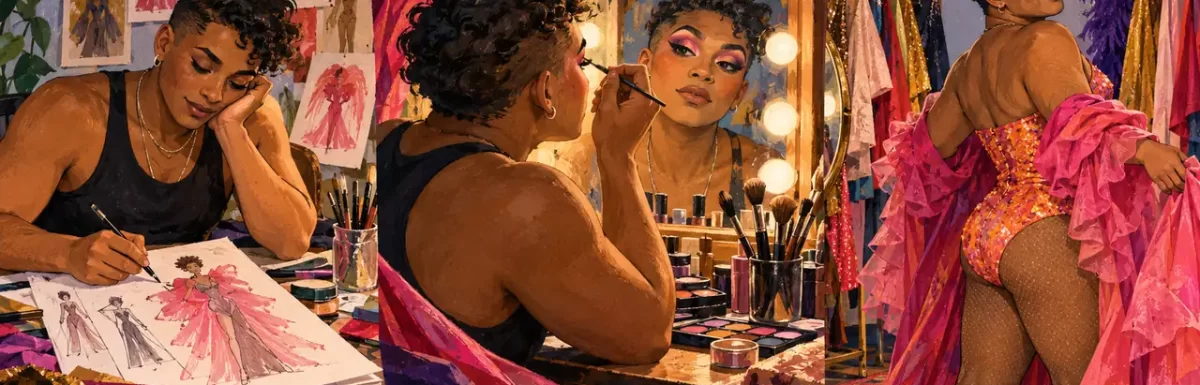
Start with one look, not an entire drag career
To start doing drag, choose one look you want to try, gather a small set of suitable makeup and clothing, and practise in a space where you can take your time. Put the pieces together, see how they feel, and change one thing on your next attempt. A stage booking can come later.
Drag can explore femininity, masculinity, a mixture of the two, or something less easily labelled. Your own gender does not have to determine the character you create. These interviews with drag performers offer different perspectives on finding a style through practice.
There is no requirement to wear heels, buy a wig, create a particular body shape or perform publicly before you can begin. Those are creative choices. For your first session, a clear idea and a manageable routine are more useful than trying every technique at once.
Choose a small first-session goal
- Try a face: practise one eye shape, lip shape or contour placement.
- Try a full look: combine makeup with an outfit and hair choice you already understand.
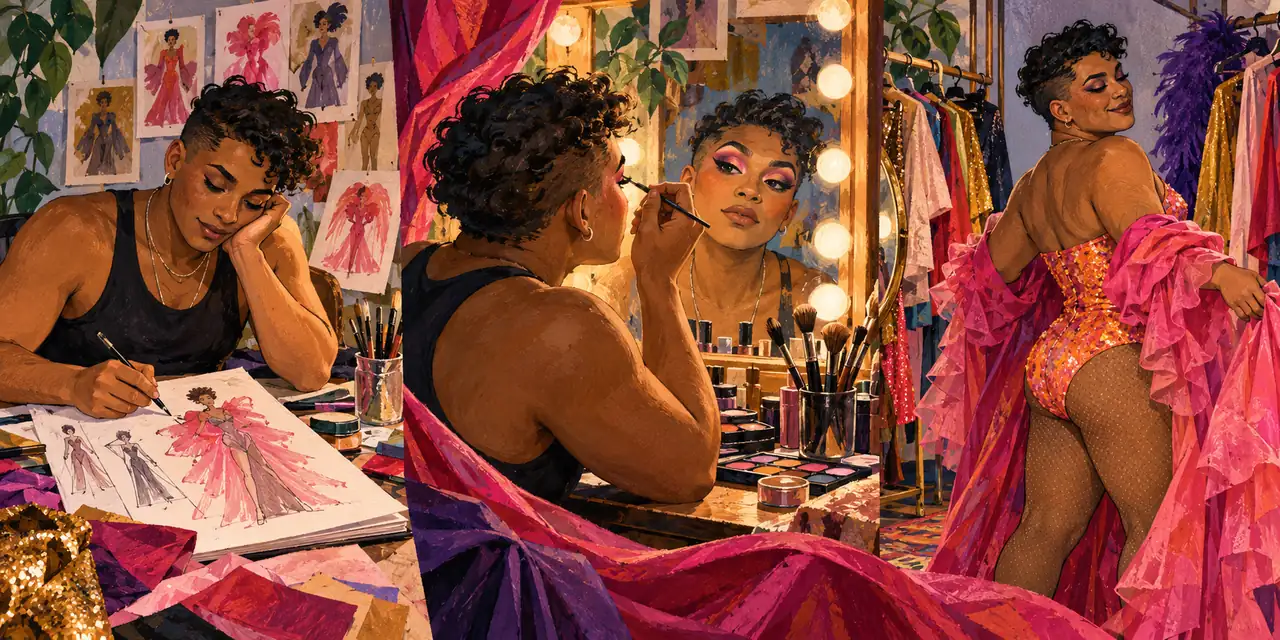
- Try a character: record a short pose, spoken introduction or performance idea privately.
Pick one of these goals. You can build the other parts after you have something to work from.
Find a direction for your character
Save a few references, then name the details you actually like: a colour combination, a strong brow, an exaggerated suit, a comic expression or an unusual silhouette. This makes a reference useful rather than something you feel you must reproduce exactly.
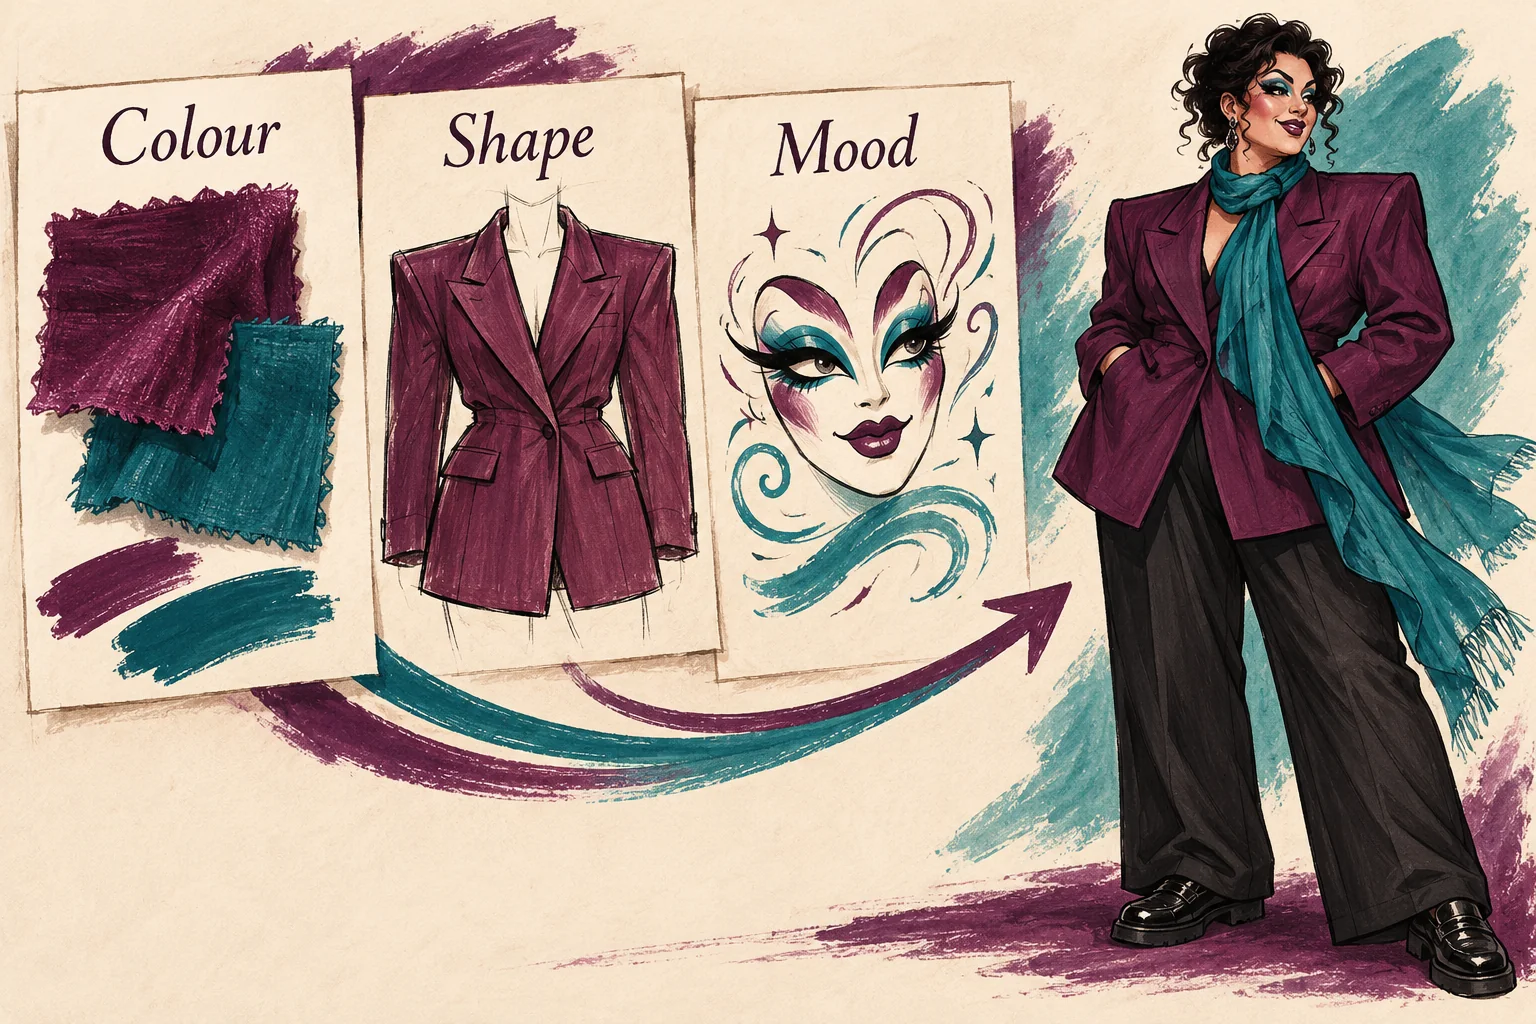
Try describing your first look in three words. “Playful, pink, oversized” suggests different choices from “sharp, dark, tailored.” Use those words when you select your outfit, makeup and accessories. They are a starting point, not a permanent brand.
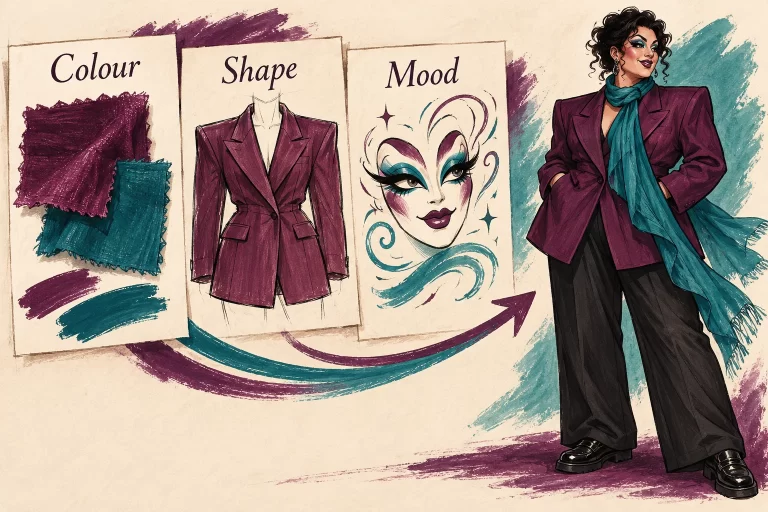
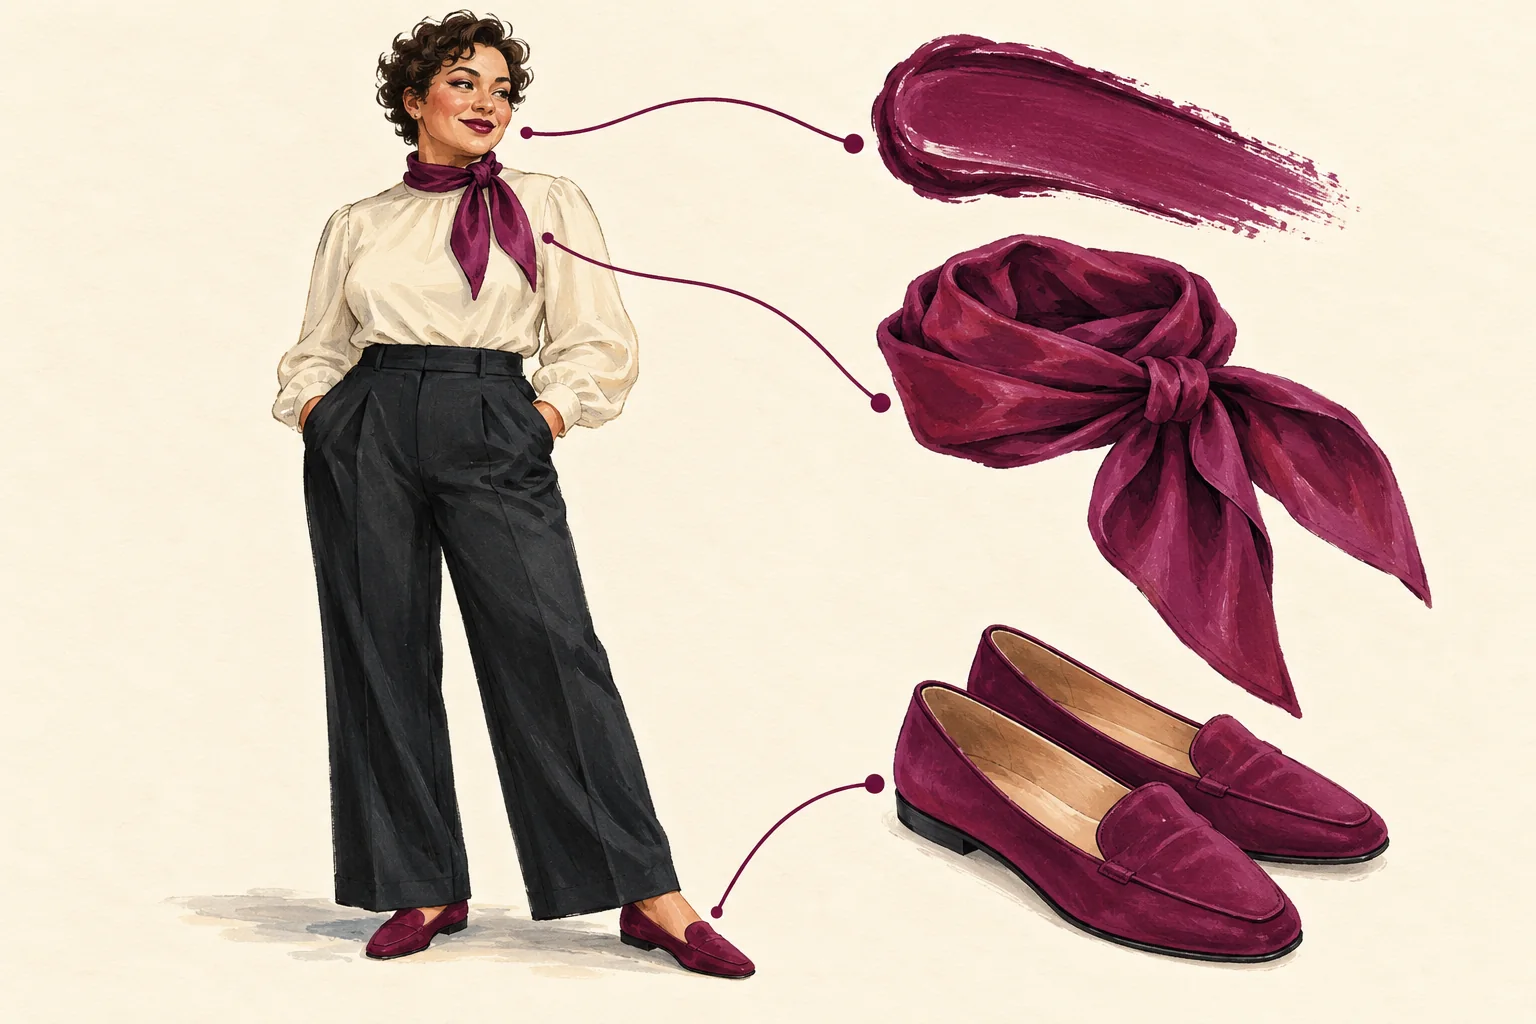
Make the reference actionable: pick one colour, one shape and one feeling. For “plum, angular, playful”, you might use a plum lip or scarf, a jacket with a strong shoulder, and an exaggerated expression. Try the pieces you own first. If a reference needs skills or equipment you do not have, borrow just one detail from it.
Your drag name can wait
A name can help you explore a character, but you do not need to settle on one before practising. Keep a working list if names are part of the fun. Before using a name publicly, check whether another active performer already uses it and consider how it sounds when introduced aloud.
Keep the cultural side in view too. Our drag culture guides are a separate place to explore the language, history and community without interrupting your first-look practice.
Decide what you need now—and what can wait
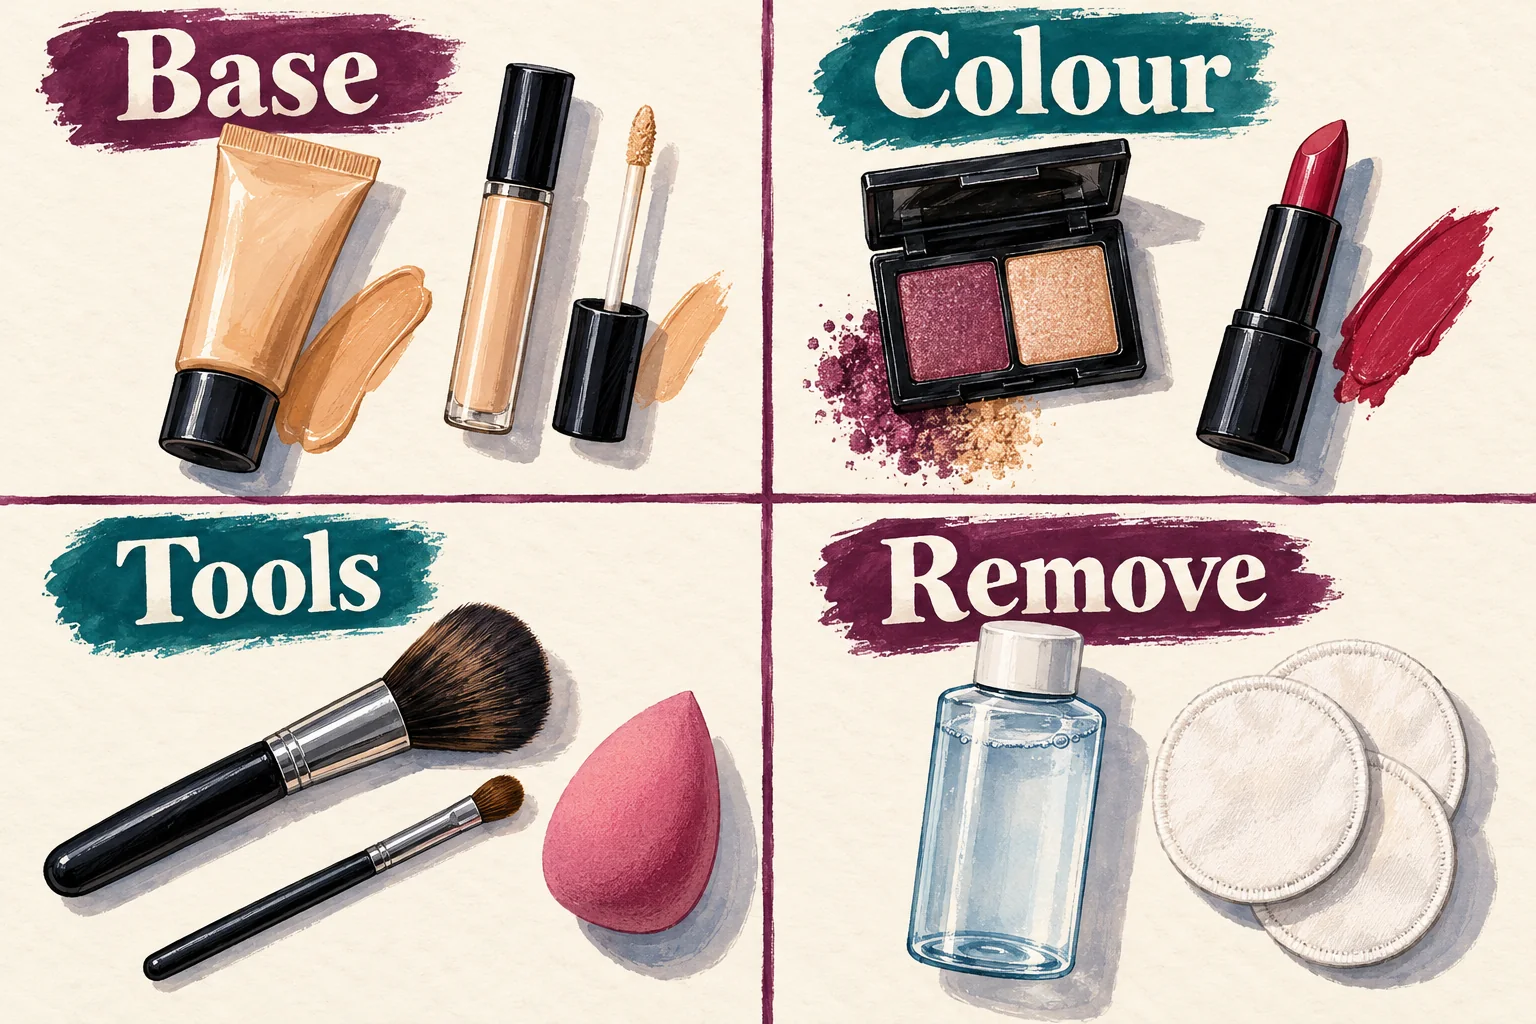
Lay out what you already own before making a shopping list. Your first kit should support your chosen look, not copy somebody else’s dressing table. You might need a base product, a few colours, application tools and an appropriate remover; a more elaborate face may use additional products.
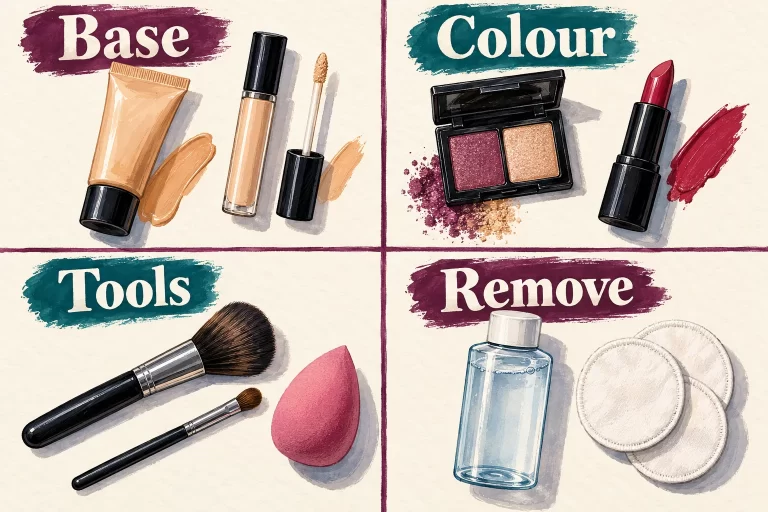
| Area | Start with | Leave until you need it |
|---|---|---|
| Makeup | Products and clean tools for the face you plan to practise; the correct remover. | Several palettes, specialist effects and duplicate products. |
| Clothing | One outfit or a few pieces you can comfortably try together. | A complete wardrobe or custom costume. |
| Hair | Your own hair, a hat or an existing hairpiece if it suits the idea. | An expensive wig or specialist styling equipment. |
| Shoes | A pair you can stand and move in comfortably. | A taller heel simply because you think drag requires it. |
| Extras | Only the accessories or practical supplies your chosen look needs. | Padding, elaborate jewellery and equipment for a future act. |
Set your own spending limit and list the missing items in order of usefulness. Include practical costs such as removal supplies and transport if you are planning an outing. You do not have to buy everything in the table; use it to decide what belongs in your plan.
For a closer look at makeup essentials, read the beginner makeup-kit guide. If you are preparing for shows rather than a home practice, the performance-budgeting guide covers a different set of decisions.
Before buying: write “I need this to do ___” beside each item. If it only completes somebody else’s shopping list, leave it for later. Our drag starter-kit guide separates useful first purchases from optional hair, clothing and storage extras.
Practise your face in manageable parts
1. Set up before opening the makeup
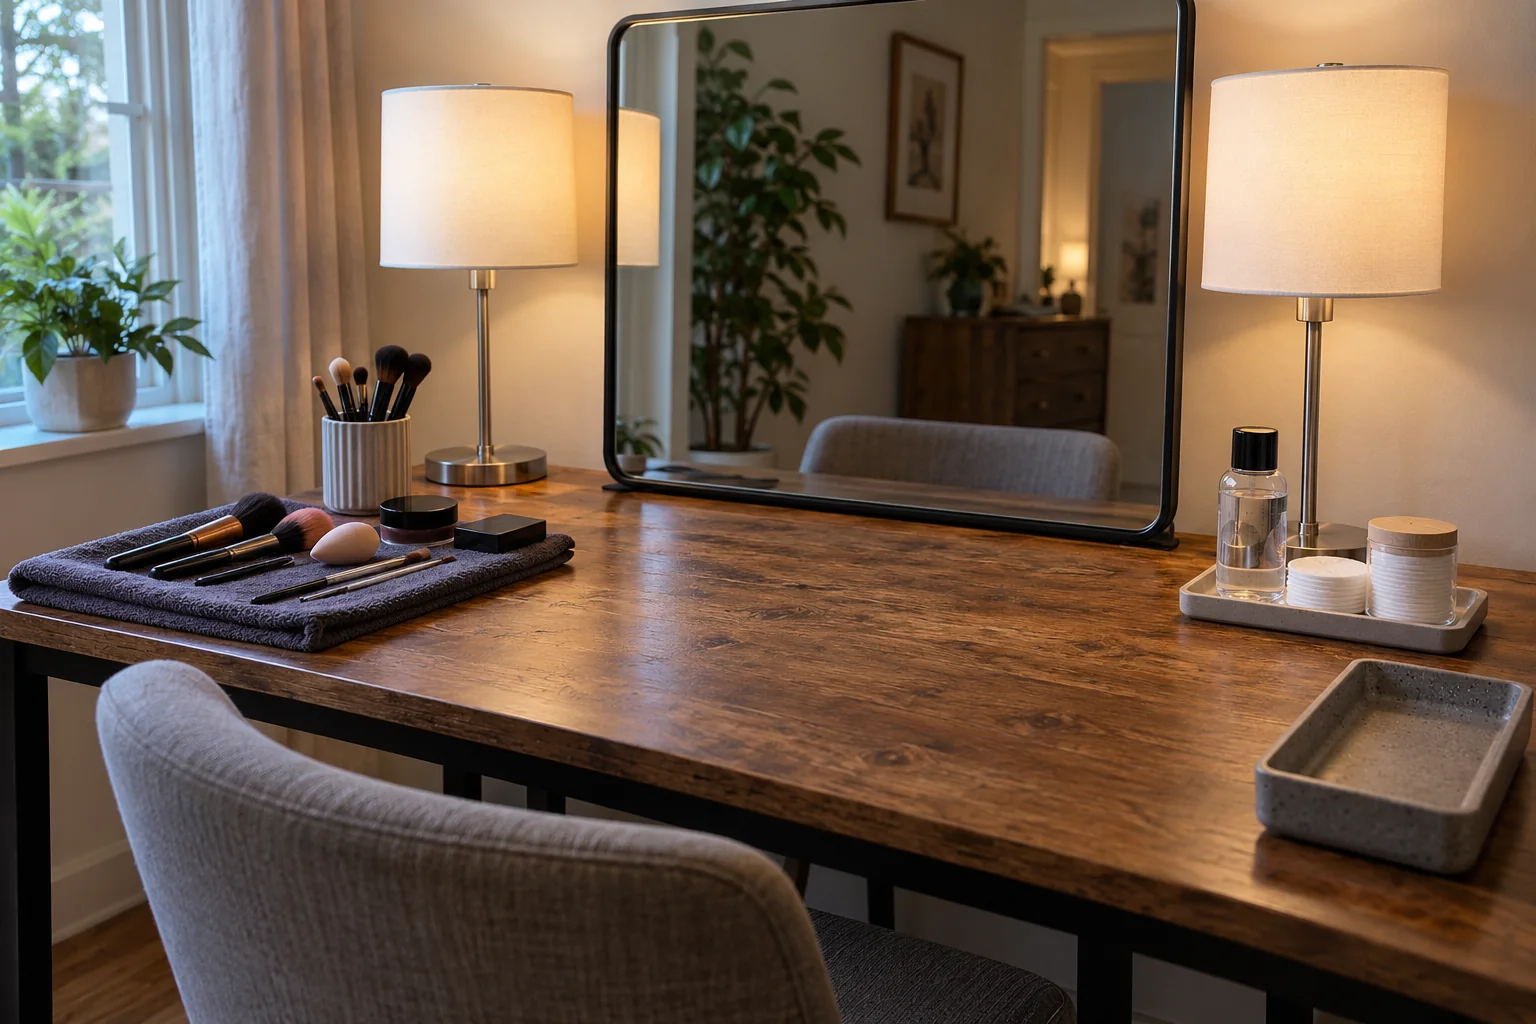
Choose a stable mirror, a clean surface and lighting that lets you see both sides of your face. Face the light rather than putting your main light behind you. Keep clean tools on a fresh towel, put used tools in a separate tray, and keep removal supplies within reach. You do not need to buy a special vanity.
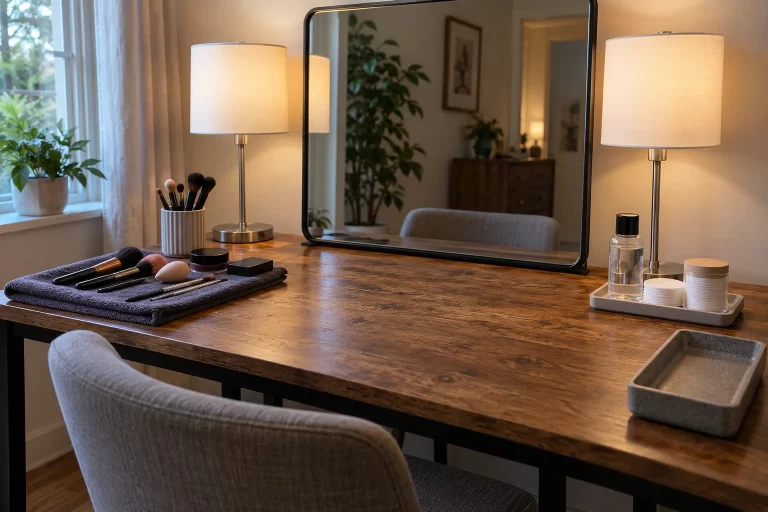
Wash your hands and start with clean skin. Follow the directions for the skin-care and makeup products you use; let your usual preparation settle before adding a base. Keep lids closed when products are not in use. Skip a new technique if you do not have the suitable product or remover for it.
2. Try a small amount of base, if your look uses it
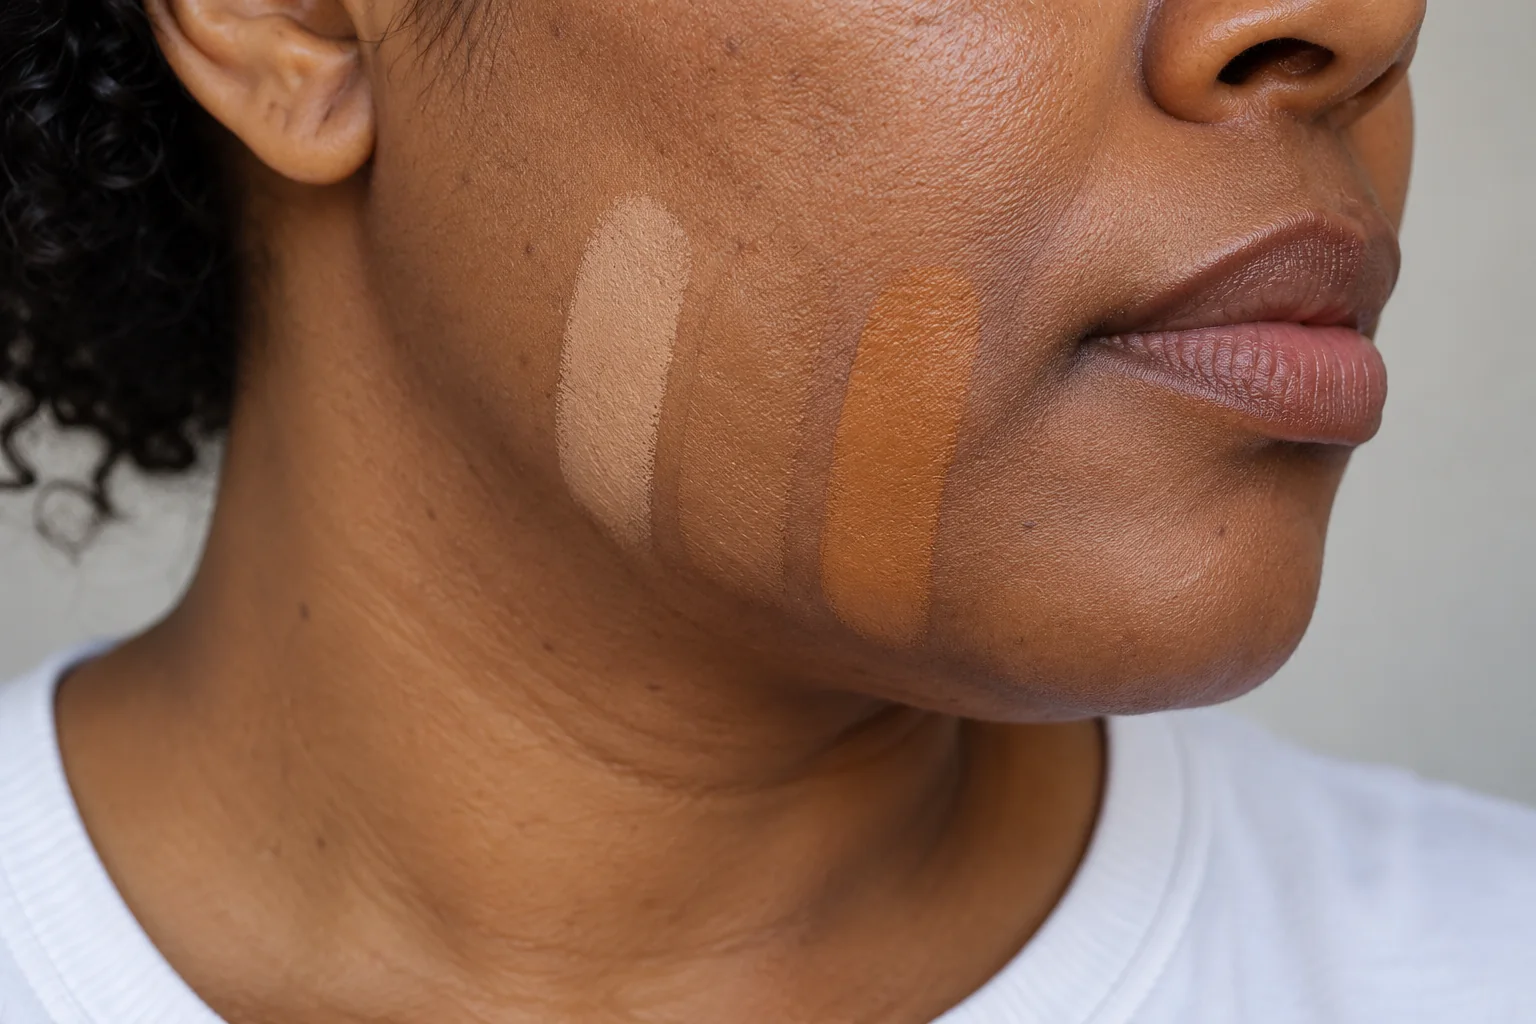
For a skin-matching foundation, compare a little at the jaw and neck in even light and check it again after it settles. A hand swatch alone may not tell you how it looks on your face. The example below compares shades, not a requirement to make your skin lighter.
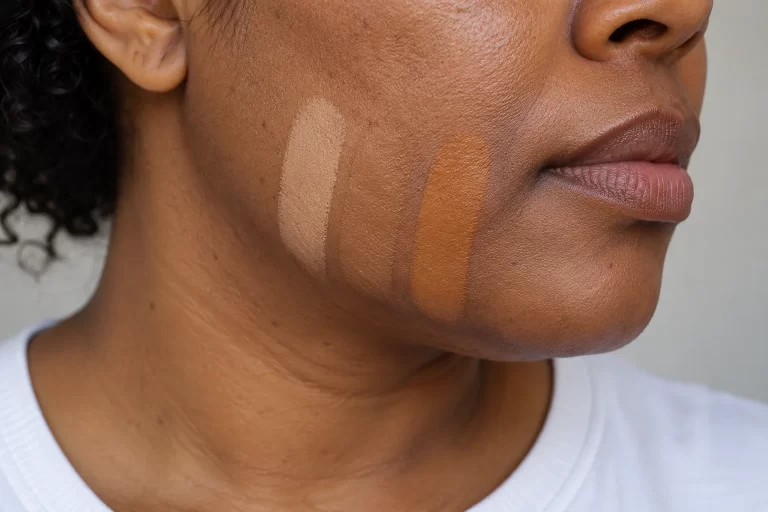
Apply a thin layer where you want coverage and blend the boundary before adding more. If you need extra coverage in one spot, work on that spot instead of coating the whole face again. An intentionally painted white or coloured character face is a different design choice: use a cosmetic intended for that area, not craft paint.
3. Practise one eye shape and keep the brow simple
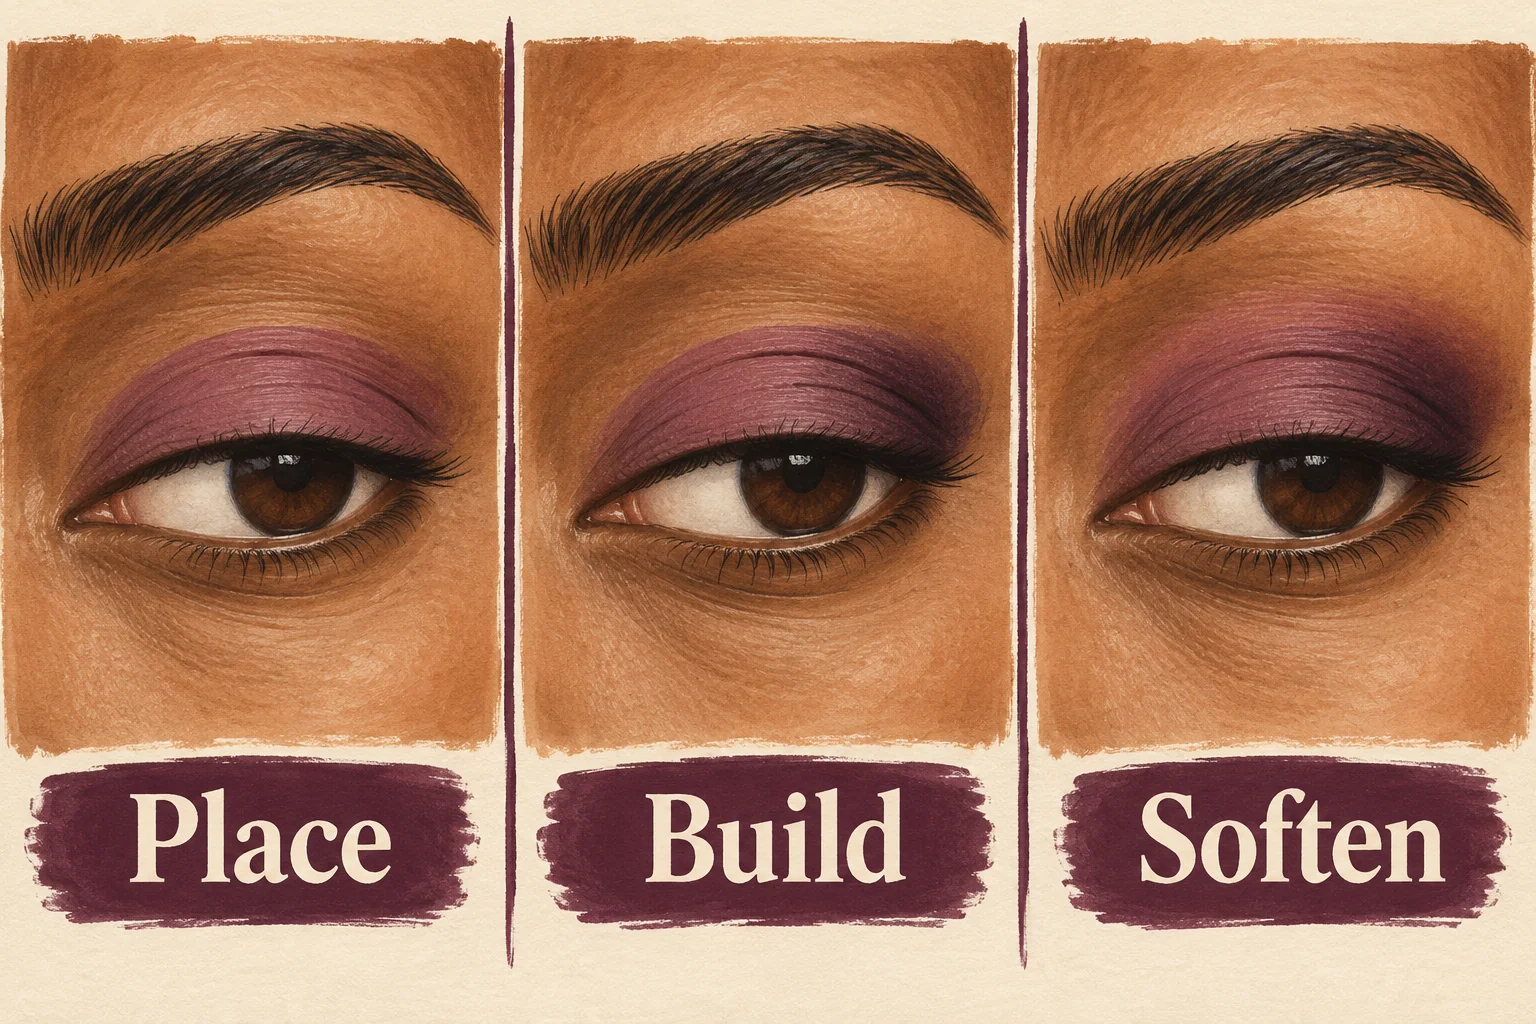
Choose one lid colour and, if useful, a deeper shade to create a little depth at the outer crease. Start with a small amount, soften the edge with a clean brush, then look straight ahead to see which part remains visible. Your lid shape may need a different placement from the reference. Repeat the shape on the other eye without chasing perfect symmetry.
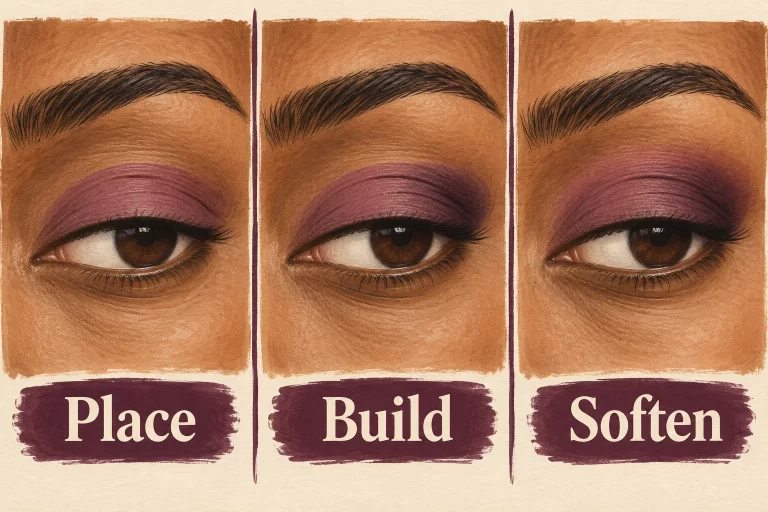
For the first attempt, you can follow your existing brow shape rather than blocking it out. A lip colour can be your focal point instead of an elaborate eye. Neither false lashes nor a cut crease is required to make the look count. If you choose lashes, check the adhesive ingredients and follow its application and removal directions; do not improvise with household glue.
Keep eye makeup appropriate to its use. Use products intended for the eye area, clean your hands and tools, and do not share eye cosmetics. Stop using an eye product if it causes irritation; seek medical advice if irritation persists. The FDA’s eye-cosmetic guidance explains these precautions. Follow the instructions for any lash adhesive and remover you use.
4. Blend a little contour, then check the whole face
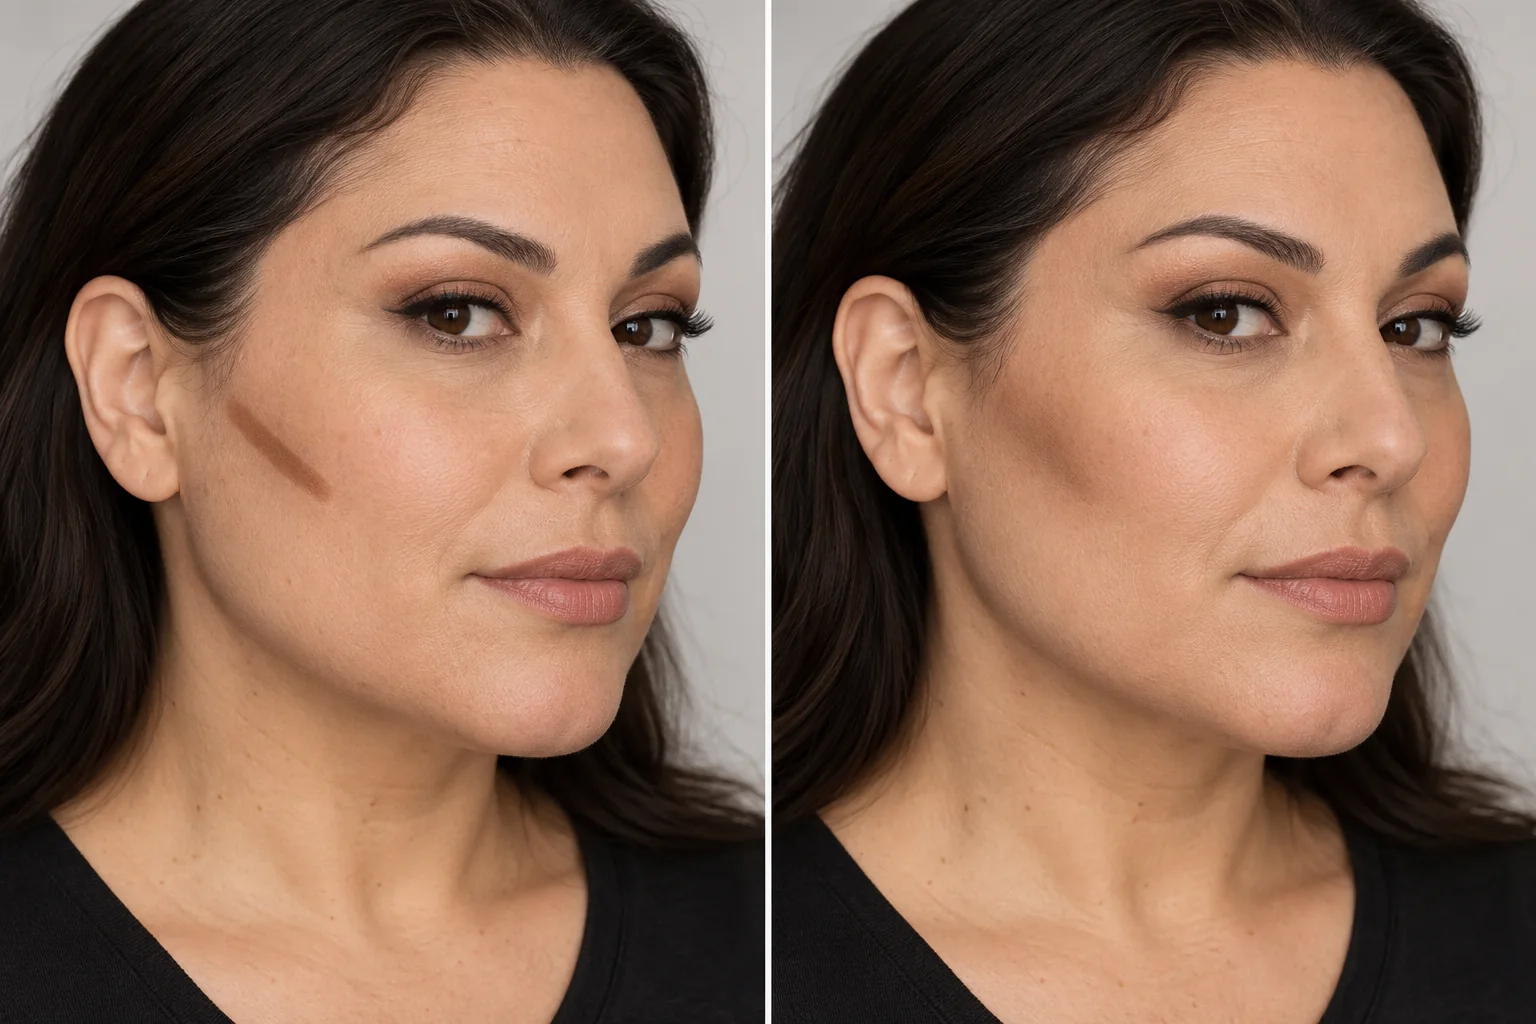
Contouring is optional. If you try it, use a small amount of a suitable contour shade near the outer cheek and soften it before adding more. Look at the result straight on as well as from the side. The illustration of a finished look is a reference, not a map every face must follow.
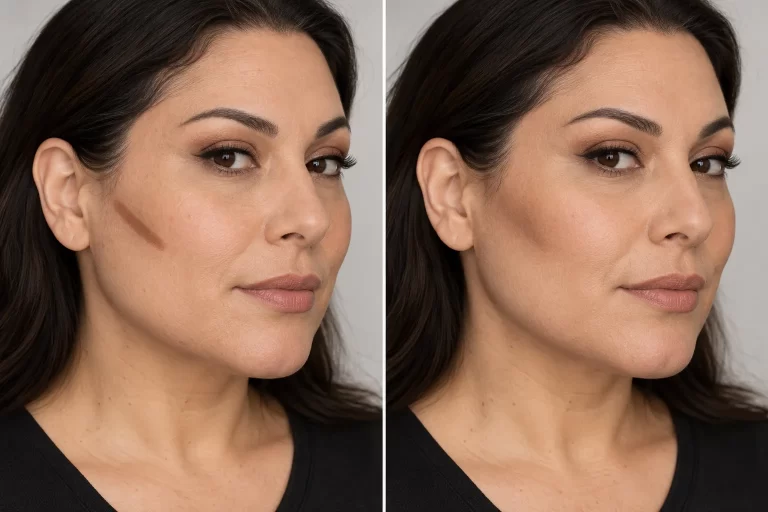
Choose whether the look needs blush, lip definition or a little setting product, using light layers and the product directions. Step back from the mirror before correcting anything: an expressive shape can work at a distance even if it is not perfectly tidy close up. For a complete product-by-product routine, use Makeup 101; use the contouring guide for more placement and blending options.
If one part goes wrong, fix that part
- The base looks heavy: stop adding product. Gently lift excess with a clean sponge; if a small area still looks wrong, remove and redo that area rather than covering it with more layers.
- An eye edge looks too strong: try a clean brush at the outer boundary before adding another dark shade. If the shape has spread too far, clean the unwanted edge with a suitable remover and rebuild locally.
- The face feels too busy: keep the feature you like most and simplify another. You can try the more ambitious reference next time.
Take one note you can act on—“use less base around the nose” is more useful than “get better at makeup”.

Put the outfit, hair and makeup together
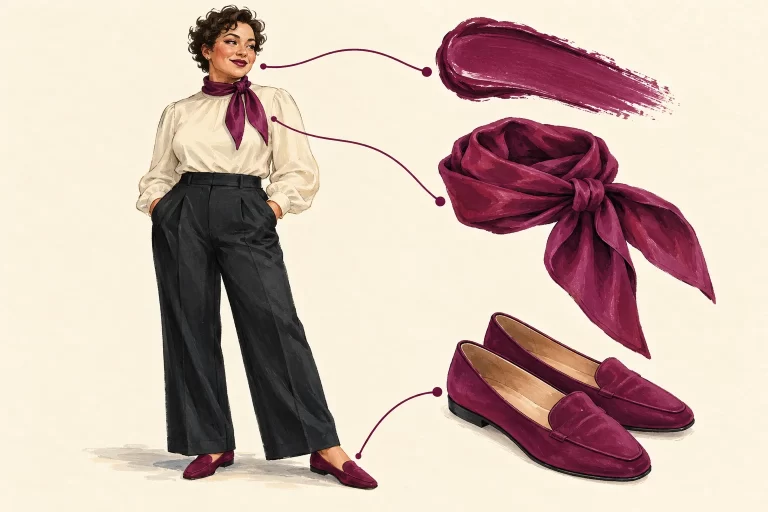
A look does not need matching pieces everywhere. Choose one detail to repeat—a colour, texture, shape or mood—and let it connect the face with the clothing. An accessory can provide that connection without requiring another purchase.
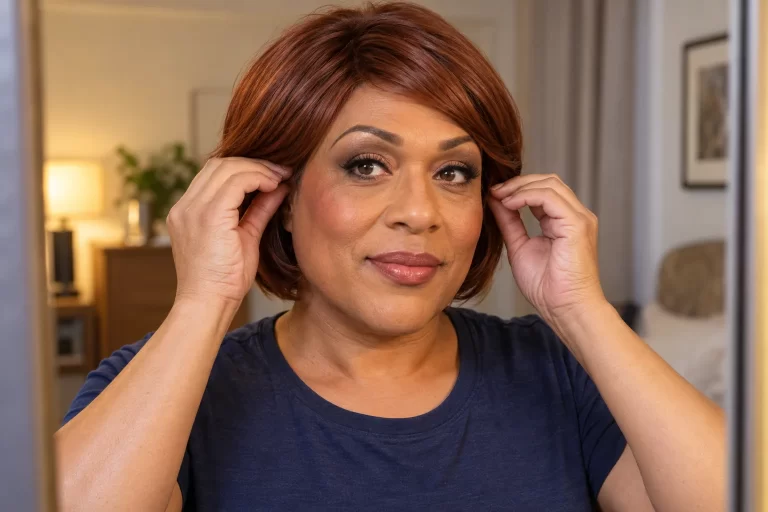
Check hair or wig fit before the final makeup touches
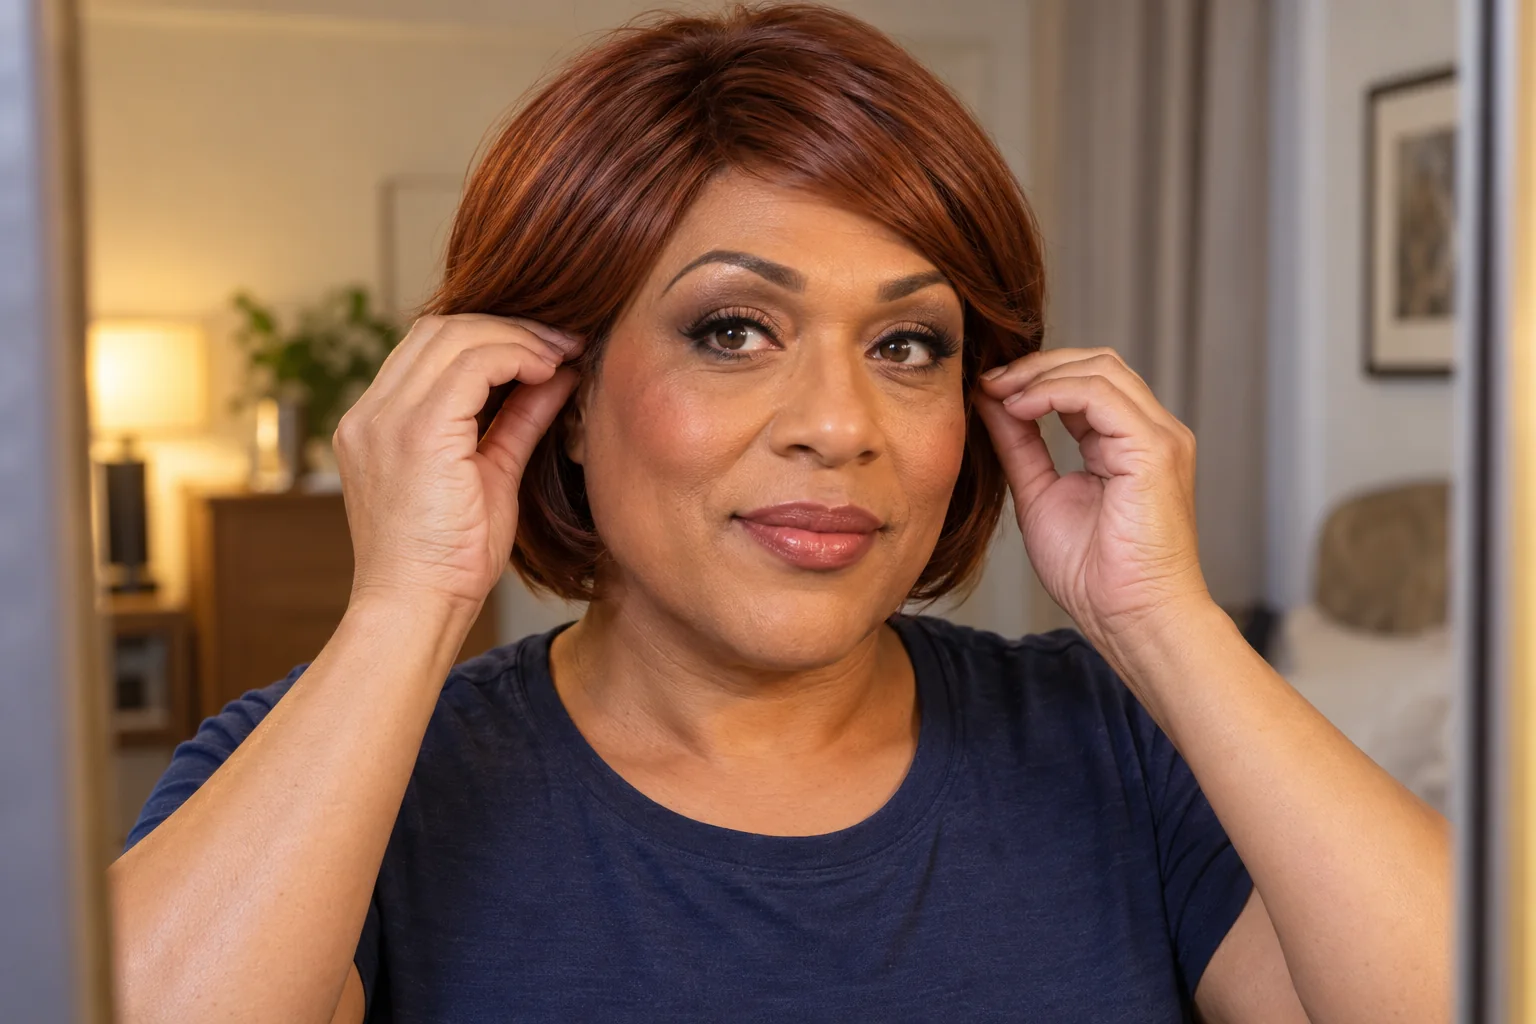
If you use a wig or hairpiece, try the fit before completing the rest of the look. Follow its care and fitting instructions, and check how it sits when you move. Your own hair or a different headpiece can also be part of the character.
For a wig with adjustable straps or ear tabs, use its fitting instructions and check that it feels secure without painful pressure. Try a gentle head turn and look down; if it slips, revisit the fit rather than automatically adding adhesive. Only use heat if the maker says the fibre can take it. You can leave wig glue and complex styling for a later session.
Do a movement check in the complete look
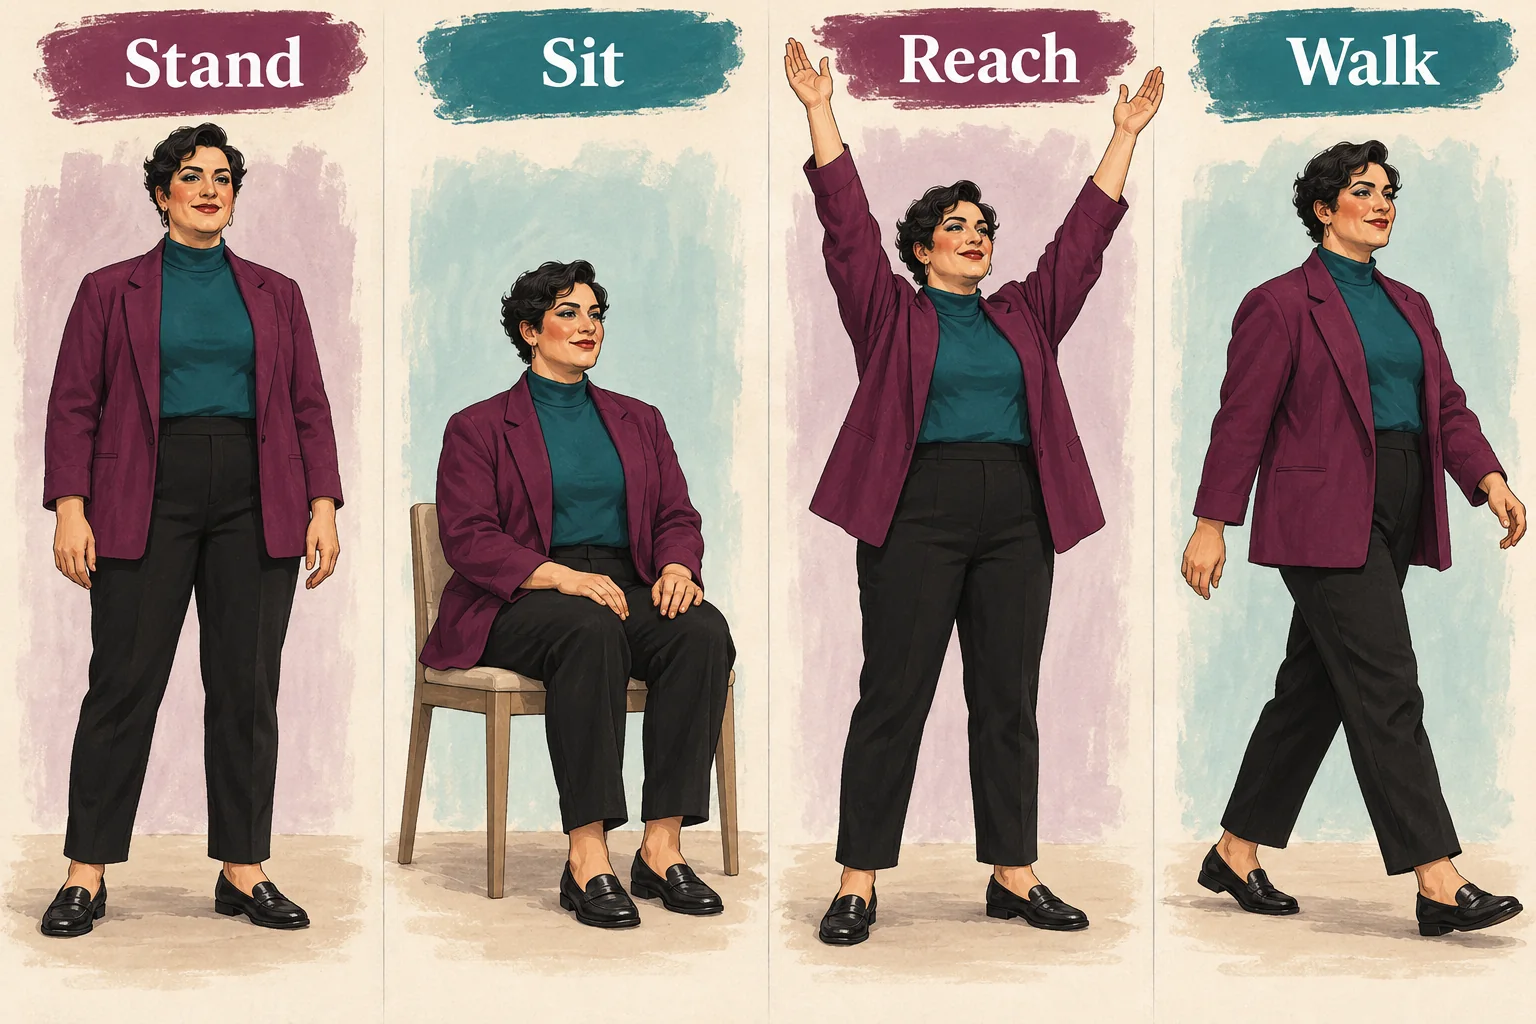
Try your outfit with the shoes and accessories you plan to wear. Walk, sit, bend and raise your arms. Check whether anything shifts, catches or makes movement uncomfortable. It is easier to change a troublesome piece during a home rehearsal than while getting ready for an event.
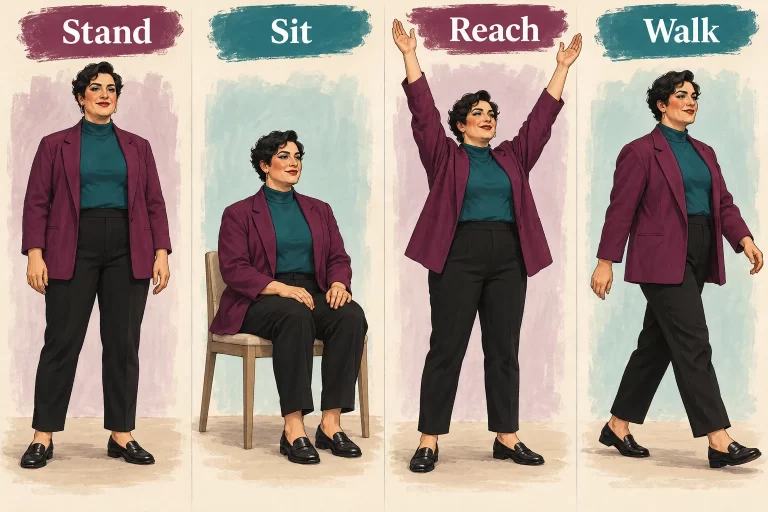
Check before leaving the room: can you sit without a fastening digging in, raise your arms without a seam pulling, and take a short step without catching a hem? A mirror shows the outfit’s shape; movement shows whether you can use it. Put on clothing that would need to pass over your head before the final face and hair touches, or choose an easy-opening layer.
If you want heels, rehearse only movements you can control on a clear, level surface, and keep comfortable alternative shoes available. Flats are a complete styling choice, not a failed first attempt. Adjust the look if you notice pain, numbness, restricted breathing or unstable footing.
For more detail, see choosing outfits for a drag performance. You do not need to turn your first look into a stage costume unless a performance is your actual goal.
Recent posts
The latest stories and guides from DragSale.


Rehearse, review, and take the look off
Give yourself a small task in the finished look. Take a photo if you are comfortable doing so, try a few poses, or record a short section of an act privately. Check the result against the goal you chose at the start—not against a performer with years of practice.
If you want to lip-sync, begin with a short passage and learn its words and changes of energy. Try it in the outfit and shoes you will use. A clear expression or deliberate gesture is something you can practise without building complicated choreography.

For a useful recording, keep the phone stable and far enough away to include your feet if you are checking movement. Watch once for the look and once for expression or timing. You do not have to share it. If a video makes review stressful, a mirror check and a written note are enough.
Write down three useful observations
- Keep: one choice that worked, such as your colour combination.
- Change: one thing to adjust, such as the eye shape or an awkward sleeve.
- Practise: one skill to repeat before adding more equipment.
Remove the look and reset your kit
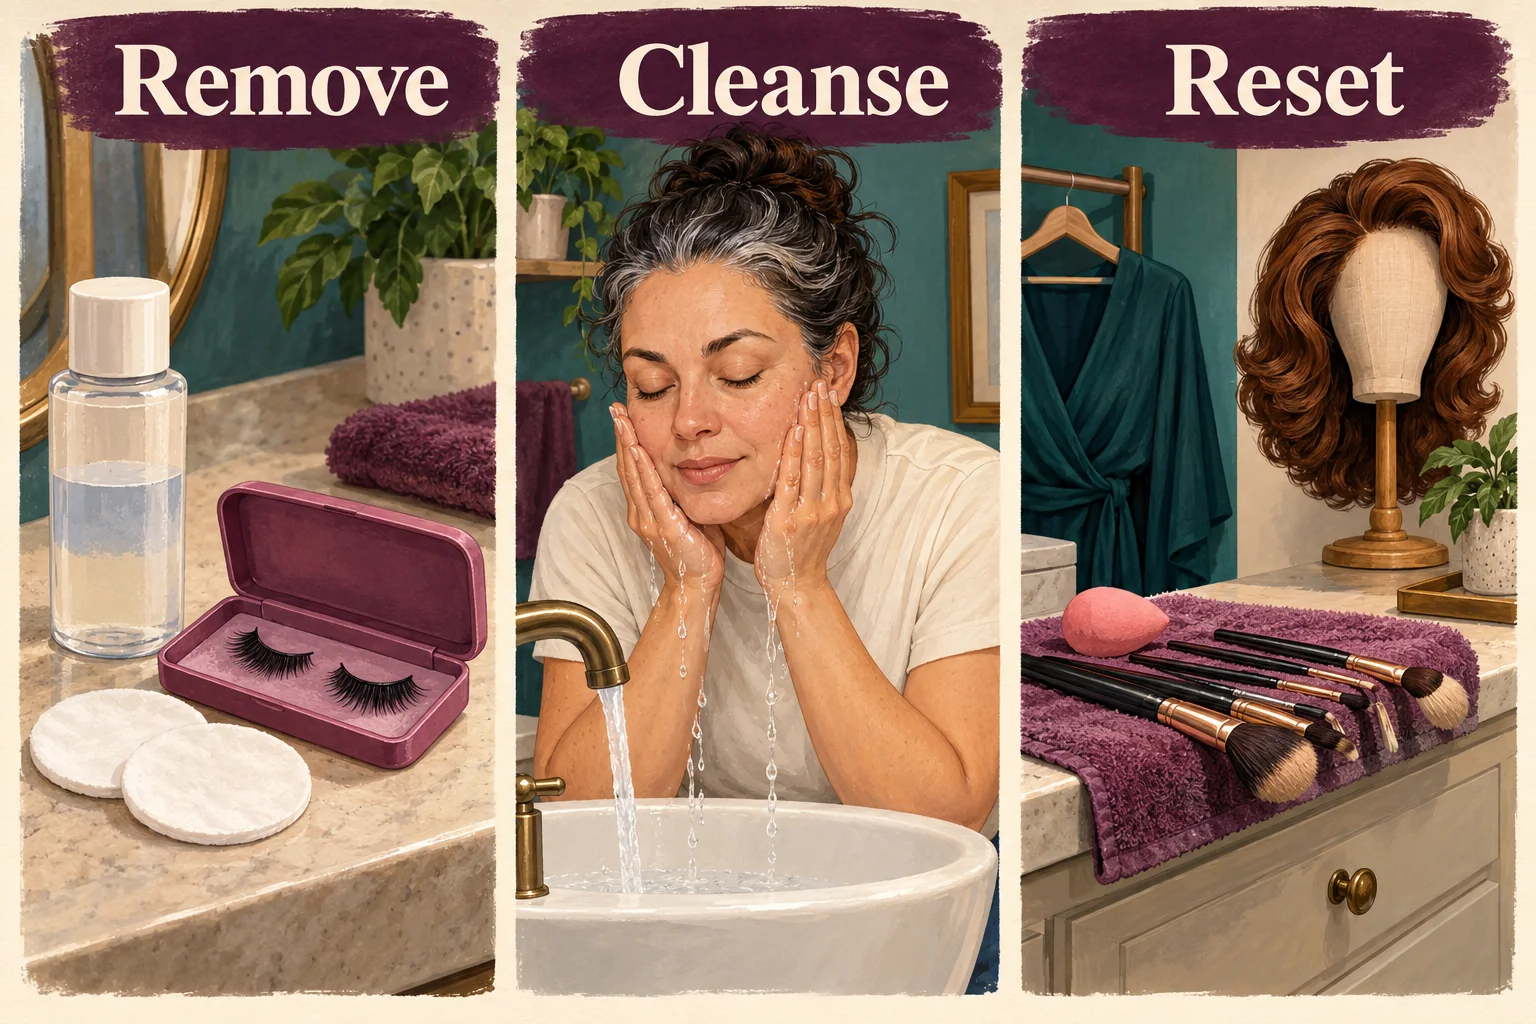
- Release adhesives as directed. Use the remover intended for the lash, hair or other adhesive. Do not pull a stuck piece free; give the appropriate remover time to work according to its directions.
- Remove makeup gently. Use a product suitable for the area and the makeup type, keeping eye products out of the eye itself. Avoid scrubbing at stubborn residue.
- Cleanse and care for your skin. Follow with gentle cleansing and your usual moisturiser as appropriate. Remove makeup before bed; the American Academy of Dermatology’s skin-care guidance explains gentle cleansing and makeup removal.
- Clean, dry and store reusable pieces. Follow the maker’s directions for brushes, sponges, lashes and hairpieces. Let cleaned tools dry before closing them into a pouch, and keep the wig and clothing away from wet supplies.
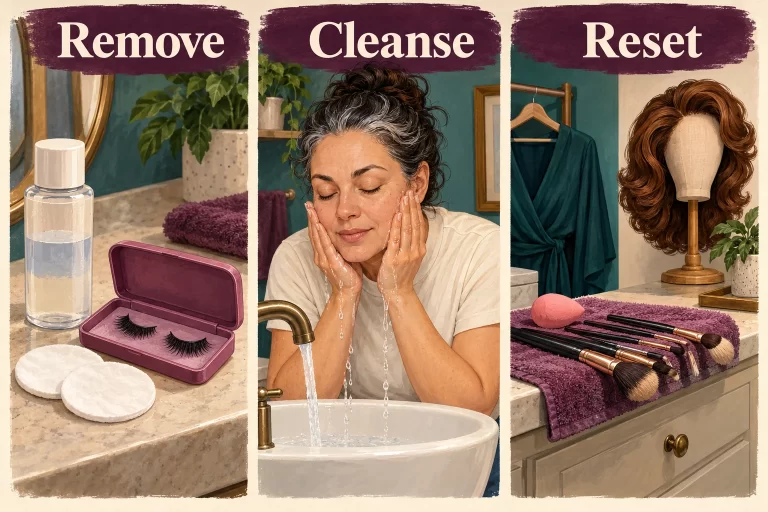
Removal and packing away are part of a repeatable routine, not an afterthought. Having the right remover ready is more useful than trying to save a few minutes at the end.
Your next session can be smaller than the first: repeat the part you wanted to improve, then add it back to the full look. That gives your practice a purpose.
Your first-look checklist
Use this as a quick check before a practice session. You can tick the items on this page; ticks are not saved between visits.
If you are heading out, add your event details, entry requirements, travel arrangements and any touch-up supplies you actually need. A home practice does not need the same packing list as a booked show. Keep keys, travel money, your phone and any necessary medication accessible in the outfit or bag you will actually use.
Find your community before rushing into bookings
You can enjoy practising drag without performing publicly. If you would like to meet other performers, look for relevant workshops, beginner events or shows with clear information about who can attend. Start as an audience member if that feels easier.
When you approach a host or organiser, ask a specific question: whether they welcome newcomers, how a particular event works, or where to find its application details. Do not assume that attending a show includes access to a dressing room or an invitation to perform.
Respect performers’ space and belongings. Ask before filming or photographing someone, follow the venue’s rules and take “not now” graciously if someone is preparing for a show. A useful question at an appropriate moment is better than expecting a performer to become an unpaid personal tutor.
When you are ready to explore bookings, read finding drag opportunities and the performance guides. Confirm the practical details with the organiser rather than assuming every event operates the same way.
Questions you might have before starting
Do I need a drag name before I practise?
No. A name can be part of building a character, but a working idea is enough for your first session. You can change it as your style develops.
Do I have to wear heels, a wig or padding?
No. Choose the pieces that serve your idea and that you can use comfortably. Those items are options, not a checklist every drag artist must complete.
How much should I spend on my first look?
There is no single useful price for every reader. Start with what you own, list what is missing for one look, and set a limit you are comfortable with. Local prices, the style you choose and reusable items all change the total.
Can I start at home without planning to perform?
Yes. Private makeup practice, styling, photography or character work can be your starting point. Performing for an audience is a separate decision.
What should I do if the first look feels disappointing?
Reduce the next session to one thing you can practise: a brow, an eye shape, an outfit combination or a short passage of an act. Keep notes about what worked instead of treating the whole attempt as a pass-or-fail test.
What if I have facial hair or do not want to cover my brows?
You can keep them and design around them. A beard, natural brow or visible texture can belong in drag; covering them is a separate technique, not an entry requirement. For a first attempt, choose a reference that works with the features you want to keep.
How long should a first transformation take?
There is no fixed beginner time. Base the session on one manageable goal and leave extra time for removal. If you have an event deadline, do a separate practice first so you know which steps you can comfortably finish.
Your next step: choose one reference, check the supplies you already have and plan one practice session. For a different part of the process, return to the Beginner guides.
Further reading
- Performer interviews on getting started in drag — Them
- Eye-cosmetic hygiene and intended use — FDA
- Gentle cleansing and makeup removal — American Academy of Dermatology
New teaching photographs and illustrations were created with AI assistance for this guide. People and product examples in those new images are fictional; captions explain the practical point. The existing makeup-practice photo has been retained.
Find your next guide
A useful answer to the next question.
 How do I put my first look together?A practical starting sequence for makeup, clothes and preparation.



Recent posts
The latest stories and guides from DragSale.
Ohhh thank you for this helpful info. I will definitely need more advice on this topic for i am a starter to drag… x