

Beginners · The DragSale journal
10 Common Beginner Drag Mistakes—and How to Fix Them
Avoid common beginner drag mistakes with practical fixes for makeup, outfit fit, timing, shoes and preparation. Choose one change for a better next session.


Most beginner drag mistakes are planning problems
A slipping outfit, rushed makeup or an uncomfortable pair of shoes can make a first attempt feel harder than it needs to be. That does not mean you are bad at drag. It usually means one part of the look needs a smaller, more repeatable plan.
The quickest improvement is to rehearse a complete look, change one problem at a time, and leave room for getting dressed, packing and removing everything afterwards. You do not need to look like an established performer to have a worthwhile first experience.
1. Trying to learn every technique in one sitting
Full eyebrow coverage, cut creases, contouring, lashes and a complicated wig can each involve a learning curve. Trying all of them for the first time before an event makes it difficult to know what went wrong.
Try this instead: choose one main feature for your first look: a bold lip, graphic eye or strong silhouette. Use a simpler version of the rest. Practise the difficult technique on a separate day when you can stop, remove it and try again.
Our first transformation guide gives you a starting sequence. Keep the sequence, but adjust the complexity to the time and experience you actually have.
2. Copying the finished photo instead of the idea
A tightly cropped, carefully lit image hides preparation, camera angle and the performer’s own proportions. Recreating every detail can leave you chasing a result that was designed for a different face, body, costume or setting.
Try this instead: name what you like: the colour contrast, lifted eye shape, exaggerated outline or playful character. Pick one of those ideas and adapt it. Take a straightforward practice photo in ordinary light, then check what reads clearly without relying on a filter.
Keep inspiration separate from self-judgement. “I want that sharp outline” gives you something to practise. “I need to look exactly like this person” does not.
3. Buying a big kit before you know your routine
A collection of products can look like a shortcut. It can also contain the wrong shades, tools you cannot use yet and duplicates of things you already own. Having more choices does not automatically make the first session easier.
Try this instead: write the steps of one look and match a suitable product or tool to each step. If something has no job on the list, put it on the later list. Our beginner makeup-kit guide helps with the cosmetic inventory.
After practice, write a specific missing item such as “a clean small brush for this edge,” rather than “better makeup.” That is a much more useful shopping brief.
4. Adding more product to fix every makeup problem
If your base looks uneven, applying another thick layer may hide the immediate patch but make texture more obvious. If an eye shape looks wrong, adding more colour may widen it further. A correction is not always an addition.
Try this instead: pause and identify the issue. Is the edge in the wrong place, the shade wrong, or an earlier layer uneven? Gently remove and redo a small area when practical. Follow the product’s directions and give each step the time it needs before adding the next.
For placement help, see our drag contouring guide. For wear problems, use the long-lasting makeup routine rather than assuming extra layers will hold better.
5. Treating makeup hygiene as an optional extra
Borrowing someone’s eye product or using a dirty tool can create a problem much more important than an uneven line. Labels matter too: a product sold for one area is not automatically suitable for another.
Try this instead: wash your hands, use clean tools and keep eye cosmetics personal. Use products intended for the eye area when working there. Do not add water or saliva to revive dried mascara. If an eye cosmetic causes irritation, stop using it; if irritation persists, seek medical advice.
These precautions follow FDA eye-cosmetic guidance. A practice session is not a reason to ignore the instructions on cosmetic or adhesive packaging.
6. Testing the outfit only while standing still
A garment can look great in the mirror and shift when you sit. Jewellery can catch on fabric. A wig can feel secure until you turn your head. Finding this out at the venue leaves fewer options.
Try this instead: rehearse the outfit as a complete system, including shoes and hair. Walk, turn, reach, sit and make the movements your performance needs. Notice catching, slipping or restricted movement. Change the fastening, fit or combination before the outing rather than hoping it will behave differently.
Keep any adjustment within the item’s intended use. If a garment or footwear choice causes pain, numbness or unstable movement, choose something else. Choosing performance outfits covers the practical side of matching clothes to movement.
Recent posts
The latest stories and guides from DragSale.



7. Choosing shoes for the photo, not the night
A pair you can tolerate for one photograph may be unsuitable for travelling, waiting around or performing. You do not have to wear heels to do drag, and height is not a substitute for control.
Try this instead: practise in the shoes you intend to use, in a clear space with a stable surface. Start with ordinary walking and turning. Choose a manageable style and keep an appropriate alternative available when you need one. Do not test unfamiliar footwear for the first time on stage.
Plan for the actual event: distance from transport, stairs, time standing and what you will carry. Comfort is part of preparation, not a sign that your look is less ambitious.
8. Timing only the makeup
“My makeup takes an hour” is not the same as “I can leave in an hour.” Dressing, fastening, styling, checking your bag and sorting travel all take time. Interruptions count too.
Try this instead: time one full rehearsal from setting out supplies to being ready to leave. Add a buffer for the parts that are not reliable yet. Put your departure time on the plan and work backwards from it.
When time gets short, simplify an optional detail instead of rushing a step that needs care. Finishing a simpler look on time is a useful skill.
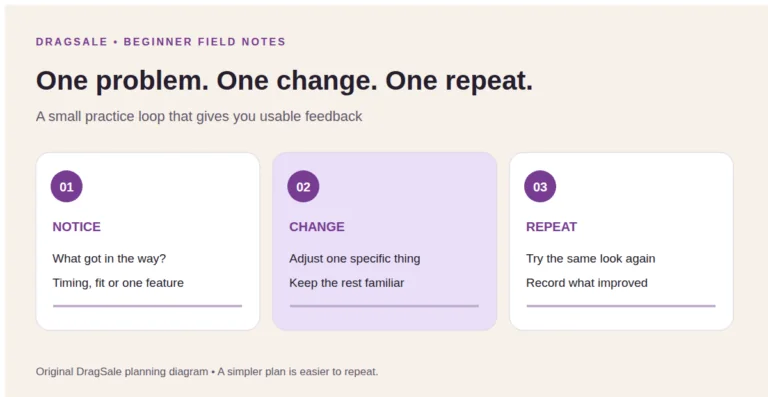
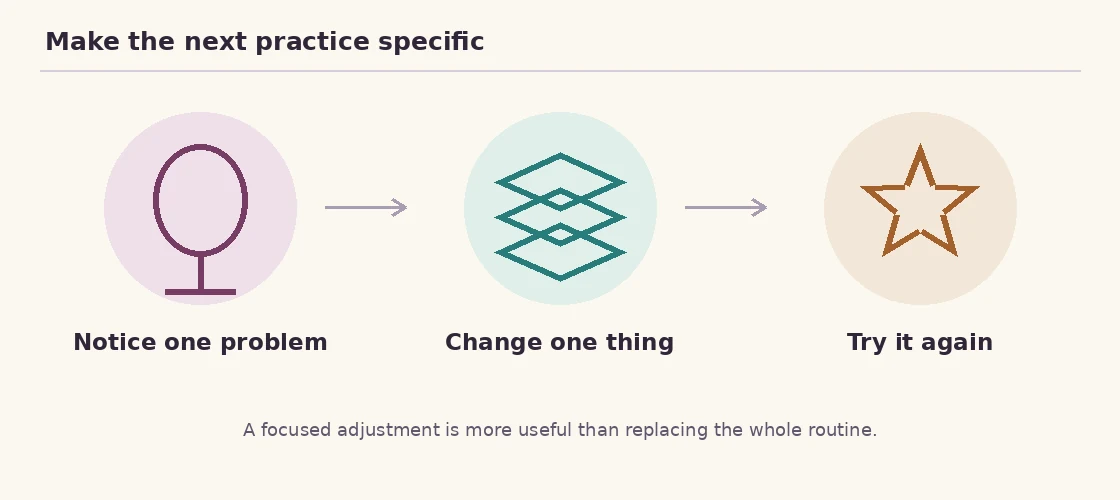
Original planning diagram by DragSale Beginners Desk.
9. Packing repairs but forgetting removal and getting home
A bag full of touch-up products is only part of the plan. You still need to return, remove the look and put reusable items away. That is easy to forget when all your attention is on arrival.
Try this instead: prepare the removal supplies at home before getting dressed. Pack only the items you know how to use, plus practical essentials such as your phone, travel details and any venue-required identification. Check your return journey before you leave.
If you are new to performing, confirm the venue’s arrival time, changing arrangements and file requirements directly. Do not assume every event has the same setup.

10. Asking for feedback that is too vague to use
“Was it good?” often gets a kind but unhelpful answer. Comparing yourself with an experienced artist can also make genuine progress hard to notice.
Try this instead: ask one concrete question: “Did my expression read from the back?” “Could you see the eye shape?” or “Did this outfit shift when I moved?” With permission, record a short rehearsal and inspect just that feature.
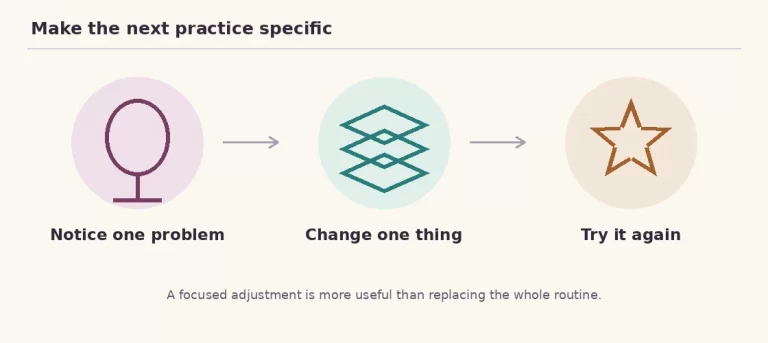
Write one thing to keep and one thing to change. Repeating the same look with one deliberate adjustment is more informative than starting a completely different look every time.
Match the problem to the next useful action
| What happened? | First thing to check | Next practice task |
|---|---|---|
| You did not finish on time | The complete getting-ready timeline | Repeat a simpler look and time all the steps |
| The makeup looked different in photos | Lighting, camera angle and the intended shape | Compare the same look in ordinary light before changing products |
| The outfit shifted | Fit and movement with every piece worn together | Walk, sit and turn in the revised combination |
| You bought things you did not use | Whether each item has a job in your routine | Build a one-look inventory before the next shop |
| You disliked the whole result | The single feature that bothered you most | Change that feature while keeping the rest familiar |
A few reassuring answers
Is it normal for a first drag look to take a long time?
Learning new steps and correcting mistakes can take time. Use a practice day to find your own full routine length. There is no universal time target you need to hit before your attempt counts.
Do I need expensive makeup to improve?
Not automatically. First check technique, product suitability and whether your tools are clean and usable. Replace a product when you can identify what it fails to do, not simply because someone else uses a more expensive one.
What should I fix first after a difficult outing?
Address comfort, irritation or unstable movement first. Then choose the practical issue that most affected finishing or participating, such as timing or fit. Cosmetic refinements can come after that.
What if my look is less dramatic than everyone else’s?
You can make it intentional through a clear colour choice, character or silhouette. Drag is not a shopping-size competition. Practise the features you care about and let the look develop over time.
Leave the next session with one useful improvement
Pick one mistake from this list, make one change, and repeat the parts you already understand. Take a photo or a short note so you can see what changed. A first attempt is information, not a verdict on whether you belong.
For a wider overview of preparation and performance, see the drag artist’s handbook. You can build a character, routine and wardrobe gradually.
Find your next guide
A useful answer to the next question.
 How do I put my first look together?A practical starting sequence for makeup, clothes and preparation.



Recent posts
The latest stories and guides from DragSale.